Experiencing loud noises from your Breville Espresso Machine? Common in models like the Barista Express, Touch, Pro, The Bambino, and The Oracle.
In this article, we’ll explore why this happens and offer straightforward solutions to bring back the quiet enjoyment of your espresso.
How To Fix A Breville Espresso Machine That Is Making Loud Noise?
- Clean the grinder thoroughly, removing the bean hopper and vacuuming out leftover beans. Brush clean all grinder parts.
- Adjust grinder components carefully, including the top part and hexagon bolt. Avoid over-tightening during reassembly.
- Inspect and replace any worn-out washers at the grinder’s bottom.
- Clear blockages in the portafilter passage using a tool like a toothpick.
- Use suitable coffee beans, avoiding overly light or flavored varieties.
- Ensure the water tank is full and perform regular descaling to prevent noises related to mineral buildup.
- If issues persist, contact Breville customer support, especially for warranty-covered repairs.
Let’s get into some more detail on how to do this below!

Breville Grinder Making Loud Noise
The first thing you want to try if the grinder makes a weird noise is to clean the entire grinder from the inside. Because coffee beans and ground coffee can get stuck there, causing the noise.
How To Clean The Coffee Grinder
Cleaning your coffee grinder regularly is essential. It not only prevents unusual noises but also ensures its proper functioning.
Regular maintenance stops it from breaking down and extends its lifespan, which is especially important if you use flavored or moist coffee beans.
Unplug And Remove The Coffee Bean Container
- Start by unplugging the espresso machine.
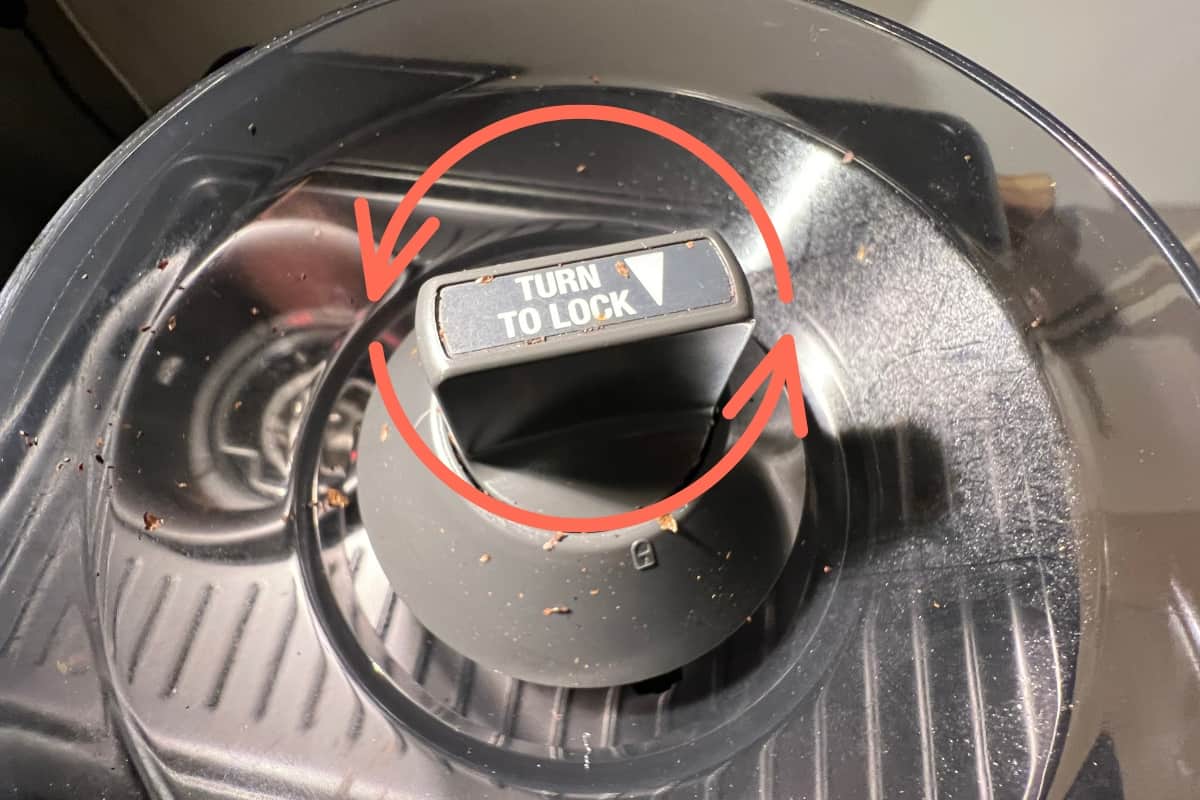
- Remove the lid of the bean hopper that is located above the grinder.
- Turn the small handle inside the bean reservoir to the left to detach it.

Vacuum The Coffee Beans Out
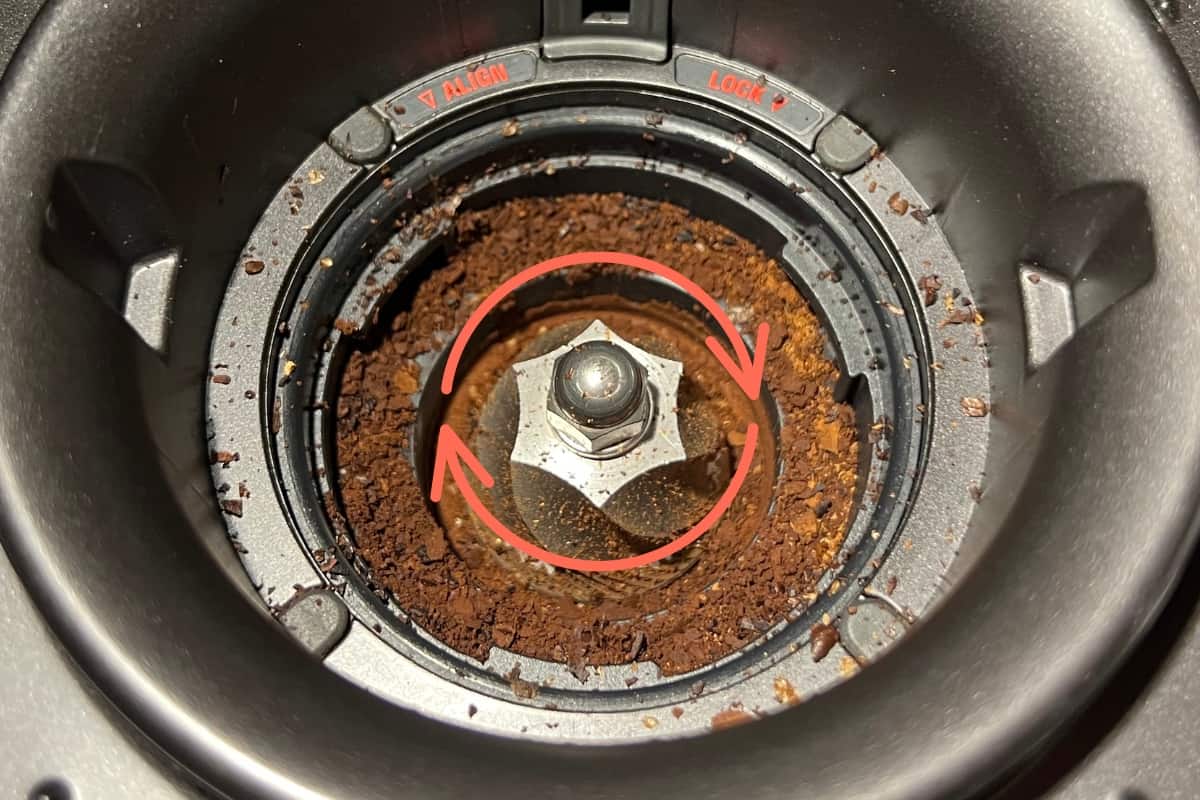
Once the bean container is removed, you’ll see the grinder with some remaining coffee beans. Vacuum these beans out.
Next, use the metal pin to turn the top part of the grinder counterclockwise for removal. Clean this part with a brush.

Remove The Hexagon Bold
Below the top burr grinder, you will see a hexagonal socket head. It’s counterintuitive, but turn this socket to the right to loosen it. Then you can get the bolt out and there are some washers on it. Make sure you remember what order it’s placed in.
Then you can take out another grinding part and clean that with a brush.

When reassembling the part with the hexagon socket, avoid over-tightening. Tighten it until the grinder starts spinning and then give it a gentle tap. This should be sufficient.
After reassembly, you’ll find more ground coffee inside the machine. Use the vacuum cleaner to remove these grounds.
Remove The Wheel
Next, you’ll notice a wheel at the bottom. Use a pair of pliers to lift it up; there’s no need to unscrew anything, as it comes off easily when pulled. This part can also be cleaned with a brush.
Remove The Cloth Ring
Take out the small fabric ring located at the bottom. Ensure the tiny cloth washers are intact, as they tend to break easily. Broken washers can cause friction between grinding parts, leading to additional noise.
With everything removed from the bottom, you’ll find more ground coffee. Vacuum this out as well.
Check the hole at the bottom, through which ground coffee passes to the portafilter. Coffee can get jammed here, so clear any blockages using a tool like a toothpick or screwdriver.
Put Grinder Back Together
Reassemble the grinder in the reverse order, ensuring it’s put together correctly. Failure to do so may result in the single and double lights flashing error, preventing your Breville from brewing coffee.
The Roast of The Beans Is Too Light Or Flavored
If the grinder still makes noise after cleaning and ensuring all parts are intact, the issue might be the type of coffee beans used. Beans that are too lightly roasted or flavored can affect the grinder’s performance.
Think of it like bread: fresh (moist) bread needs tearing, while old (dry) bread breaks easily. Similarly, darker roasted beans, which contain less moisture, are easier for the grinder to process finely. The grinder is efficient at snapping beans but struggles with tearing.
Additionally, flavored beans tend to stick to the grinder, leading to jams and reduced functionality.
The Last Thing You Could Try
If none of the mentioned solutions resolve the issue, the problem may lie with the motor or other internal components of the machine.
Unless you’re skilled in appliance repair, your best option is to reach out to Breville customer support. If your espresso machine is still under warranty, they will either repair it at no cost or possibly provide a replacement.
Breville Making Noise After Pushing Espresso Brew Button
Make Sure There Is Water In The Tank
Ensure that the water tank is adequately filled. This is straightforward but crucial. When the Breville machine can’t draw water, it pulls in air, leading to strange noises.
Beyond just noise, it’s important to avoid pressing the brew button when there’s no water in the tank. Doing so can trap air bubbles in the tubes, resulting in inconsistent espresso pours or even clogging the machine.
The Breville Espresso Machine Needs Cleaning And Descaling
When there’s significant mineral buildup in the heating component and tubes of Breville espresso machines, they tend to make different sounds.
Even a small amount of scale can cause a buzzing noise. In this situation, the best course of action is to thoroughly clean and descale your Breville machine.
You don’t necessarily have to wait for the clean/descale light to come on before you descale it.
Cleaning Cycle On The Breville Espresso Machine
To start the cleaning cycle on your Breville espresso machine:
- Remove the portafilter and insert the one-cup basket along with the cleaning disk.
- Place a non-branded cleaning tablet (which is just as effective but less expensive than Breville’s own tablets) in the center of the portafilter and reattach it to the machine.
- Place a large container beneath the portafilter.
- Simultaneously press and hold the one-cup, two-cup, and power buttons for 10 seconds to initiate the cleaning cycle.

Descaling Cycle On The Breville Espresso Machine
To perform the descaling cycle on your Breville espresso machine:
- Do not use white vinegar for descaling, as it can damage the machine. Instead, opt for a non-branded descaling solution, which is more cost-effective than Breville’s own solution.
- Follow the instructions on the descaling solution’s bottle to mix it with water in the tank. A typical ratio is a one-to-one solution to water.
- Turn off your machine, then press and hold both the two-cup button and the power button for 5 seconds to enter descaling mode, indicated by flashing lights.
- In descaling mode, first hold the one-cup button for 25 seconds to allow the solution to flow through the portafilter.
- Activate the hot water for 10 seconds and then the steam function for 15 seconds. Repeat this cycle until the water tank is empty.
- Turn off the machine. When you restart your Breville, the ‘clean me’ descaling light should be off.

Conclusion
Loud noise from a Breville Espresso Machine can be caused by a variety of issues, from a problem with the grinder to a build-up of mineral deposits inside the machine.
By understanding the possible causes, and implementing some of the solutions provided in this article, you will be able to solve the issue and enjoy your coffee in peace and quiet once again.
Remember regular cleaning and descaling of your machine will ensure a longer lifespan of the machine and also noise-free operation. If you still have troubles, don’t hesitate to contact Breville support.
Thanks for reading!
